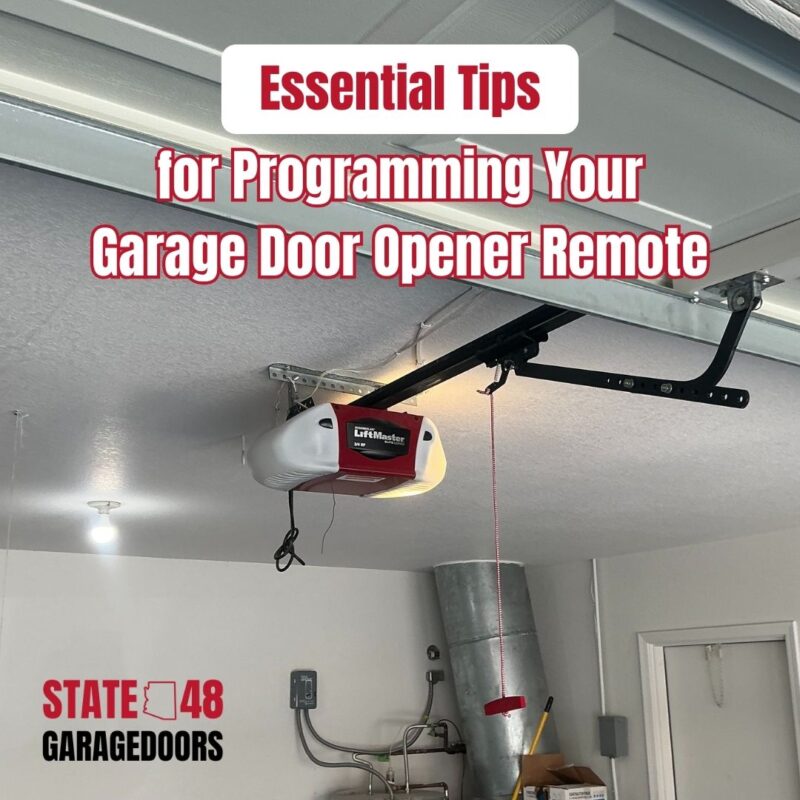
How to Program Your Garage Door Opener Remote
Ever wonder why your old remote keeps failing? In this guide, I’ll explain how to program your garage door opener remote using clear methods like the learn button and DIP switch configuration. You’ll gain insight into syncing universal remotes and troubleshooting common issues. By following these steps, you can fix inconvenience and improve safety with ease.
Prepare for Your Garage Door Opener Setup

I begin by identifying the brand and model of my garage opener, then locate the Learn button or DIP switches on the motor unit. After gathering essentials like my remote, ladder, and keychain, I clear the area to ensure a safe working space. I also check the battery in my current remote and make sure the setup is neat and visually appealing—complete with bright LED lights, a clear window display, and an intuitive radio interface.
Identify Your Garage Door OpenerBrand and Model
I start by checking my inventory and making sure I have my transmitter, wireless components, and a ladder within reach, while identifying the brand and model of my garage door opener. I compare the details on the device to the label on my car‘s manual to ensure my setup matches the specifications and is ready for programming:
Locate the Learn Button or DIP Switches on Your Opener Motor
I start by locating the learn button or DIP switches on my opener motor, following the instructions in my user guide to sync the right frequency for my overhead door. I often double-check my settings to avoid unnecessary garage door repair, recalling a moment when I had misplaced a remote while preparing dinner in my kitchen:
Gather Necessary Items Like Your Remote and a Ladder
I double-check that I have all necessary items at hand, such as my door opener remote and a sturdy ladder, before I start any programming on my garage door opener. I always make sure there’s an extra battery for quick replacement while I verify the rolling code settings on my garage door, ensuring that every component is ready for a smooth setup experience.
Clear the Area Around the Garage Door for Safety
I make sure the area around my garage door remains clear of any obstructing furniture and debris before starting the programming process to prevent any accidents while I work on the radio receiver and keypad. This extra step has helped me avoid unnecessary troubleshooting and even saved on warranty claims during previous projects.
Check the Existing Remote Battery or Install a New One
I check the remote battery before I program my garage door opener remote for the liftmaster to ensure a smooth operation, verifying that the battery is strong enough or replacing it if needed, and I also inspect the switch, belt, and button to avoid any hiccups during setup:
- Examine battery charge levels
- Test the functionality of the button and switch
- Replace weak batteries to maintain optimal performance
Program Garage Remote Using the Learn Button Method

I press and release the learn button on my motor unit, then hold my new remote’s button until I see flashing lighting or hear clicks. I test the door to ensure smooth operation and emailcustomer service if issues arise, repeating these steps for extra remotes to boost home improvement projects and overall ease.
Press and Release the Learn Button on the Motor Unit
I press and release the learn button on my motor unit to initiate the syncing process, keeping an eye on the antenna alignment as I login into my home automation interface to monitor changes in real-time. This step ensures that even when I adjust my roof sensors or check my plumbing systems, everything works harmoniously together:
Press and Hold the Button on Your New Remote Control
I press and hold the button on my new remote control while keeping an eye on the indicator light, ensuring that every step is clear as I check that my wire connections are secure and that my surroundings—from the carpet to the floor—remain safe during the process. I often pause to confirm that my setup is correct by using my telephone as a reference tool, which helps me troubleshoot any issues quickly and effectively.
Wait for Confirmation Signals Like Flashing Lights or Clicks
I patiently watch for the sensor‘s signal, whether it’s a quick flash of lights or a distinct click, during the pairing process of my universal remote. Recognizing these cues reassures me that my garage door opener is correctly synchronized, similar to when I check each screw during a routine fix to verify everything is secure and functioning well. This approach helps me avoid any unnecessary frustration and ensures a smoother operation overall.
Test the Newly Programmed Remote Control
I test the newly programmed remote control by pressing each button and checking the memory function on my smartphone to monitor how well the electronics maintain a steady connection while I verify the security of my setup:
- Press the remote and observe the response
- Check the memory retention using my smartphone
- Monitor the electronics for consistent performance
- Confirm that the security protocols are active and reliable
Repeat Steps for Additional Remote Controls
I repeat the same process for any extra remotes, making sure each one matches my setup and works for every customer, while keeping the procedure straightforward and manageable. I verify each device to maintain a smooth operation and consistent home automation experience:
Set Up Your Remote With DIP Switch Configuration
I open my old remote casing and match its DIP switch sequence to my new remote. If I lack an old remote, I locate the matching switches inside the opener motor unit, adjust them carefully with a small tool, and test the remote to ensure smooth operation. This process forms the basis for a reliable upgrade to my garage door system.
Open the Casing on Your Old Remote and the New Remote
I begin by carefully opening the casing on my old remote and then doing the same with the new one, ensuring I have clear access to the DIP switch configurations that control the device’s pairing. I double-check each step to confirm that every switch is in the correct position to guarantee a smooth transition:
- Remove the screws from the casing of the old remote.
- Examine the DIP switch settings and note their positions.
- Open the new remote casing and align its switches with the noted configuration.
Match the DIP Switch Sequence on the New Remote to the Old One
To ensure smooth transmission, I carefully align the DIP switches on my new remote to match the configuration of the old one. Double-checking each setting helps prevent miscommunication during programming and offers a straightforward way to avoid common issues. This method has proven both practical and reliable when upgrading my remote for a secure, accurate setup.
Find the Matching DIP Switches Inside the Opener Motor Unit if No Old Remote Exists
I open the motor unit and locate the DIP switches that match the settings I need, checking carefully with my manufacturer’s guide to ensure accuracy. I then adjust the new remote’s switches to mirror these settings, confirming that every change matches the motor unit’s configuration so my programming process moves along smoothly.
Carefully Adjust Switches Using a Small Tool if Needed
I often use a small, precise tool to carefully adjust the DIP switches when setting up my remote, which helps me avoid any errors during the pairing process. This hands-on method has saved me time and frustration by ensuring the settings match perfectly with my motor unit’s configuration. My experience shows that a little extra care with the tool makes the entire programming process a lot smoother and more reliable.
Test the Remote After Setting the Switches
I test the remote by pressing its buttons to confirm that my garage door opens smoothly and that the DIP switch settings are correctly applied:
- Activate the remote control
- Verify signal response
- Observe accurate door movement
Syncing Universal Garage Door Remotes

I consult the universal remote‘s instruction manual to check my opener’s compatibility, follow the manufacturer steps, enter the required codes, and use the auto-scan option. I then verify that the remote pairs successfully with my opener, ensuring a smooth setup and continued reliability with my garage door openerprogramming process.
Consult the Universal Remote‘s Specific Instruction Manual
I make it a point to carefully read the universal remote‘s manual because it provides step-by-step instructions tailored to my device, which saves me time and hassle during setup. This hands-on advice has helped me understand the required codes and syncing procedures without any guesswork, ensuring my garage door opener works as expected every time I update its settings.
Determine Your Opener’s Compatibility With the Universal Remote
I start by checking my garage door opener‘s model information and the universal remote‘s compatibility list to verify a match; this step helps me avoid potential setup issues and unnecessary troubleshooting by confirming that both devices are designed to work together:
Follow Manufacturer Steps for Universal RemoteProgramming
I carefully follow the steps outlined in the manufacturer’s guide to ensure the universal remote pairs perfectly with my garage door opener. By entering the required codes and using the auto-scan feature, I can quickly adjust the settings, which has saved me time and prevented any frustration during setup.
Input Manufacturer Codes or Use Auto-Scan Features
I enter the manufacturer codes directly into my universal remote, which simplifies the pairing process and guarantees that the device communicates properly with my garage door opener. I also use the auto-scan feature when I need a quick troubleshooting option, knowing that this method minimizes setup time and reduces frustration. This hands-on approach works well whenever I update my home system, ensuring smooth performance every time.
Verify Successful Universal Remote Operation
I verify the universal remote works by testing it repeatedly to make sure each command triggers the correct door movement. I check its signal response, programming accuracy, and overall reliability to make sure I can rely on it for everyday use:
Troubleshooting Common Garage Remote Programming Issues

I offer tips for troubleshooting common garage opener issues, including what to do when the remote fails to program, how to address signal interference, reset the opener’s memory, and resolve problems with range or inconsistent operation. I also explain what steps to take when the opener light blinks but doesn’t sync, providing clear guidance to fix these challenges.
What to Do When the Remote Fails to Program
I’ve noticed that when my remote fails to program, the first thing I check is the battery and sync settings for my garage door opener to ensure everything is correctly aligned; this helps me quickly identify if the issue lies in the hardware or signal interference:
Addressing Signal Interference Problems
When I experience signal interference while programming my garage door opener remote, I first review nearby devices that could be causing disruptions and reposition them to clear the area for optimal transmission:
- Move wireless routers away from the opener
- Disable overlapping devices temporarily
- Ensure no large metal objects block the signal
Resetting the Garage Door Opener‘s Memory
I reset my garage door opener‘s memory by following a straightforward process outlined in the manufacturer’s guide, which often involves pressing a dedicated clear button for a few seconds. This hands-on method has helped me quickly resolve sync errors and ensure that my remote communicates properly with the opener, making it a practical solution for common programming issues.
Solving Issues With Range or Inconsistent Operation
I have noticed that my remote’s range can sometimes be limited and operation may feel unpredictable, so I check my battery and inspect nearby devices that might be causing interference before trying any adjustments:
- Review battery condition
- Relocate potential signal disruptors
- Test the remote in different positions
When Your Opener Light Blinks but Doesn’t Sync
I’ve experienced moments when my opener light flashes yet the remote doesn’t sync, so I recheck the battery and ensure the transmitter is aligned correctly with the motor unit. I find that a quick reset of the system and a clear area free from interference often fixes the problem, letting my garage door work smoothly again.
Maintaining Security and Functionality After Programming

I make sure to erase lost or stolen remote codes and test my garage door safety reversal system regularly. I keep my garage remote guide handy, check remote batteries often, and know when to call a pro. These steps help me maintain security and smooth functionality after programming my opener remote.
Erase Lost or Stolen Remote Codes From the Opener Memory
I start by erasing any remote codes from the opener memory when a device goes missing to keep my setup secure and efficient. I follow a clear process that involves accessing the settings on my unit and then pressing the designated clear button to remove old codes, ensuring no unauthorized access remains in the system:
Regularly Test Your Garage Door Safety Reversal System
I test my garage door safety reversal system on a regular basis to ensure it responds smoothly during an unexpected situation. I press the safety button and observe the door‘s movement to confirm that the mechanism works as designed, leaving me confident in the system’s performance:
Keep Your Garage Remote Guide for Future Reference
I always keep my garage remote guide within reach because it helps me troubleshoot any issues quickly and keeps my home secure, especially after I complete programming. I store it in a visible spot near my setup to serve as a handy checklist for periodic reviews and updates:
Perform Periodic Battery Checks on Your Remotes
I routinely check my remote batteries every few months to prevent any unexpected issues. Keeping an eye on battery levels not only ensures smooth operation but also saves me from additional troubleshooting time when my garage door remote is needed the most.
Understand When Professional Assistance Might Be Needed
I find that my own troubleshooting skills work well for many setup issues, but there are times when calling a technician saves a lot of stress. When I encounter unusual behavior or intricate hardware settings that seem out of place, I trust the expertise of a professional to ensure my system remains secure and functional. A quick consultation with a specialist has often prevented further complications and gave me peace of mind knowing my garage door operates reliably.